Showing posts with label vegan. Show all posts

Wednesday, April 18, 2012

RED LENTIL QUINOA SOUP - Andes Style

Our family took a vacation of a lifetime - we went to Ecuador and the Galapagos.   Two nights we stayed at an amazing place in the Andes called Hacienda Zuleta  where they made their meals from their own organic garden.  One evening we were served a Quinoa Soup as a starter.  In their culture they serve a thin type of salsa at the table to add to the flavor of their dishes called  aji.  We found ourselves adding aji willy nilly and it made everything taste better.  You can add your own version of aji by adding your favorite spicy condiment.

This soup was inspired by our experience.  I added the red lentils for added texture and protein.  My soup most definitely can be tweaked many different ways depending on what veggies you have in your fridge.

2 tablespoons olive oil 
1 onion diced small
3-4 stalks celery diced small
2-3 cloves garlic minced
1 tablespoon fresh ginger minced
2-3 medium tomatoes diced
4-5 cups water
1 bouillon cube (optional)
1 cup red lentils
1 cup quinoa
1 can coconut milk
1 cup fresh cilantro loosely packed (chop the leaves and the stems separately)
Salt and Pepper to taste
Hot sauce or salsa optional

In a large stock pot sauté the onion, celery, garlic and ginger with the olive oil for about 5 minutes until the onions are translucent.  Add the tomatoes and sauté for a couple minutes. 

Add the water, bouillon cube, red lentils and quinoa and chopped cilantro leaves .  Simmer covered for about 15 minutes.  Add the cilantro leaves and the coconut milk.  Season to your taste.  You may also want to add a little bit more water depending on how thick you like your soup.

We hiked and biked our way through the Andes.

Banana delivery


Our group on our most amazing adventure through Ecuador and the Galapapos.


Wednesday, March 7, 2012

THREE NUT "CHEESE"


Getting that cheesy flavor without buying processed vegan food can be difficult, but I think Robin Asbell of Big Vegan cracked the code.  The cheese flavor and  creamy consistency are similar to  Alouette cheese.  It is great on crackers, in a wrap, mixed into a tomato sauce, or dolloped on a simple margherita pizza or cauliflower pizza.  We have made her recipe a handful of times and can’t seem to get enough of it.  Because I can’t leave anything well enough alone, I have made a few changes.  The acidophilus capsules that she mentions are made with gelatin, so I used Multidophilus Powder instead.  ¼ teaspoon seems to be the right amount.  I also added garlic powder.  You could add some dried or fresh herbs too.  The possibilities are endless.

Don’t be scared off by the two day process.  It does take some pre-planning but it is not time consuming.  You will be so glad you did.

A note on Robin Asbell:  Robin has written several vegan cookbooks, but this is the first one I purchased.  I am going to check out some of her earlier cookbooks when I get a chance.


INGREDIENTS:
1/3 cup macadamia nuts
1/3 cup raw cashews
1/3 cup slivered or flaked almonds
¼ teaspoon vegan Multidophilus Powder or similar (be careful some Acidophilus formulas include milk, goats milk or gelatin)
1 Tablespoon oil (I used olive oil or coconut oil)
1 teaspoon fresh lemon juice
½ teaspoon salt
Garlic powder to taste

Two days ahead:
Put the nuts in a bowl and cover in cool water and refrigerate overnight. 

The next day, drain the nuts and puree in a blender or food processor with ½ cup fresh water.  Puree until nice and smooth.  You might have to scrape down the sides a few times.  Add the Multidophilus or Acidophilus powder and mix well.   Transfer the cheese mixture to a ceramic or glass container and cover loosely.  Let stand at room temperature for 24 hours.  You will start to see the cheese expand and bubble a little bit.  That is what gives the three nut “cheese” its great flavor.

When the cheese is ready and has fermented for the full 24 hours, add the oil, lemon, salt and garlic powder.  Cover tightly and refrigerate.  You are ready to enjoy. 


Thursday, March 1, 2012

SWEET POTATO MAC AND CHEEZE MY WAY


When I was at the grocery store a few weeks ago I noticed that four cooking magazines showcased Mac and Cheese on their cover, each picture more rich and gooey than the other.  Do the magazine editors sit down and agree on the same thing and try to outdo each other or does everyone crave Mac and Cheese when it gets colder?

My answer is Mac and Cheese is good any time of the year!  This version is easy to make and easy on the waistline. 


INGREDIENTS:
1 pound whole grain pasta
1 large sweet potato
2 cloves garlic minced
1 large leek cleaned and chopped (a medium onion will work fine too)
2 medium sized tomatoes chopped or
   1 can chopped tomatoes with some of the juices drained
1 can coconut milk
½ cup nutritional yeast
2 teaspoons toasted cumin, ground
1 teaspoon Northwoods Fire (a spicy mixture by Penzeys Spices of salt, chipotle pepper, Hungarian paprika, garlic, rosemary, thyme, black pepper and cayenne ) optional
Red pepper flakes to taste
A squeeze of lemon, lime or vinegar to taste
Salt and pepper to taste

Start the pasta water and cook pasta according manufacturer’s directions.

Meanwhile steam the peeled and chopped sweet potato in a medium sized saucepan with an inch or two of water until tender - about 10 minutes. 

At the same time in a large frying pan sauté the garlic and leeks in the olive oil on medium heat for about 5 minutes or until soft and glossy.  Add the chopped tomatoes and spices and heat through a few more minutes. 

While the leek mixture is simmering, add the sweet potatoes, coconut milk and nutritional yeast to a blender.  Be careful since the potatoes are hot.  Blend until smooth and then add to the simmering vegetables.  Adjust seasoning to taste.  I added about a tablespoon of vinegar and red pepper flakes. 

(White wine could be added to the leeks during the initial sautéing.  If I had thought about it earlier I would have done that.  This recipe is very flexible to your taste.  You can make it sweeter or spicier.   A squeeze of lemon or lime at the end would be good too.)


Thursday, February 16, 2012

CHOCOLATE APRICOT TRUFFLES

Madison and I decided to celebrate Valentine’s Day by making truffles.   The apricots and almonds give the filling an amazing flavor.  Even though the original recipe calls for honey, you could substitute agave nectar or maple syrup and achieve the same results.  This recipe came together in no time and the combination of apricots and dark chocolate just make these truffles zing!

(This recipe was found in the USA Weekend insert of the Sunday paper by Ellie Krieger, registered dietitian and cookbook author Comfort Food Fix: Feel Good Favorites Made Healthy.)


Ingredients:
½ cup whole, natural unsalted almonds
1 ½ cups dried apricots
1 tablespoon honey (you could substitute agave nectar or maple syrup)
½ teaspoon ground cinnamon
½ teaspoon ground ginger
1/8 teaspoon salt
5 ounces dark chocolate chopped
 (60-70% cocoa solids)


Place the almonds in a dry skillet over a medium high heat, stirring frequently.  After about 5 minutes the almonds will become fragrant and toasty.  Set aside to cool.

Put almonds into a food processor and pulse a few times until the nuts are coarsely chopped.  Add the apricots, honey, cinnamon, ginger and salt to the processor; process until the ingredients are finely chopped and begin to stick together.

Roll the mixture with your hands into teaspoon-sized balls and set them on a baking sheet lined with waxed paper or a silpat.

Use a small bowl or double boiler over a saucepan of barely simmering water.  Melt the chocolate in the bowl and roll the apricot balls into the melted chocolate.  Place the truffles on a silpat or waxed paper and cool in a refrigerator for about 15 minutes until set.


Makes about 30 truffles

Monday, November 7, 2011

CHEEZY CORNY CHOWDER


While a lot of my Connecticut friends were suffering in the cold and dark, I was without my phone and Internet in Florida.  I'm not complaining, mind you, just dealing with the lack of all that the 21st Century has to offer.  Now that I am back online the good news is so are our northern friends.  I am so sad that they had to live through a week of no power.  Here is a soup that  may not turn your power on in your house, but may provide super-power for your energy level.

If you don't have fresh corn like we do in southern Florida, frozen corn will work just fine.  Please see my notes on nutritional yeast.  It is a life saver in the kitchen when you need a little something that will add a protein punch and it tastes good too.

1 tablespoon olive oil
1 1/2 sweet onions chopped fine
4 ears corn cut from cob (approx. 2 cups)
1 - 15 ounce can diced tomatoes
1 - 13.5 ounce can coconut milk (light or regular)
2 cups water
4-6 small potatoes cut into bite size
1/2 cup nutritional yeast *
1 teaspoon  vindaloo spice *
1 teaspoon toasted cumin *
1 teaspoon  balsamic vinegar
salt and pepper to taste

Sauté onions with the olive oil  until translucent - add corn and continue cooking for about 10 minutes.  Add water, coconut milk, and tomatoes with their juice.  Add potatoes, nutritional yeast and spices. Cook for about 20-30 minutes until potatoes are cooked through.  Use an immersion blender to cream half of the soup.

Season with salt, pepper and balsamic vinegar to taste.

*nutritional yeast is not a baking yeast.  It is a yeast product that sprinkles like Parmesan cheese and has a slight nutty cheesy flavor.  It is full of protein, fiber and minerals and it is what give this soup a thick cheesy flavor.

 * Vindaloo spice is a mixture or ground coriander, garlic cumin, ginger, cinnamon, brown mustard, red pepper, jalapeño, cardamom, turmeric, black pepper and clove.  My jar is from Penzey's Spices.  Substitute with your favorite mixture if you would like.

* Please see a previous post on toasted cumin.  It is one of my favorite to make fresh from cumin seeds.  Purchased  ground cumin is fine.  I like the complexity in taste that the toasted cumin provides.

Monday, October 24, 2011

PUMPKIN APPLE BREAD


We were lucky enough to be in Boston with the older girls this weekend.  We checked out their new apartment and even though they have not been there for long, they were quite snug in their new digs.  They surprised us with an apple picking excursion while we were there which meant gorging on apples and apple doughnuts!  Yum!!!! We were also able to smuggle quite a few of the incredibly crisp apples back to Boca.

I couldn't find any pumpkin apple bread recipes that were healthy enough, so I came up with my own.  There is hardly any fat and a lot less sugar than most quick bread recipes.  I also added some whole grains and whole fruit just to make it a bit more wholesome. I have a feeling the pumpkin and apple combination will be a new favorite in our house. 

This recipe makes two loaves and mixes easily without an electric mixer. 

Ingredients:
2 cups whole wheat flour
1 1/2 cups all-purpose flour
1 cup sugar (least processed preferable)
2 teaspoons baking soda
1 teaspoon baking powder
3/4 teaspoon salt
1 tablespoon cinnamon
1/2 teaspoon nutmeg
1/2 teaspoon allspice
1 teaspoon ginger
1/4 cup agave nectar
1/4 cup canola oil
2 teaspoons vanilla extract
2 apples chopped into small pieces (don't peel)
1 (16 ounce) can pumpkin
2 tablespoons flax seed mixed with 6 tablespoons water to make slurry
Topping
1/2 cup chopped walnuts
1 tablespoon vegan butter melted
1 tablespoon brown sugar
1 teaspoon cinnamon
.
Directions:
Preheat oven to 350 degrees.
Grease two 9 inch loaf pans

In a large bowl mix all dry ingredients thoroughly.
In a second large bowl combine all wet ingredients and mix thoroughly.

Pour wet ingredients into mixed dry ingredients. Mix just until thoroughly combined. Do not over mix as this will cause a tough bread.

Bake at 350 degrees for approximately 60 minutes or until toothpick inserted in the center comes out clean. Halfway through the cooking process mix the topping ingredients and put on top of the bread loaves. Rotate the pans at the same time. 


The family with their loot!


Monday, October 17, 2011

HEALTHY CHOCOLATE CHIP COOKIES

These chocolate chip cookies are sinfully good, good for you and are a breeze to make.  No mixer needed.   See my note about the oat flour.  Rather than purchasing specialty flour you can make it yourself. 

Ingredients:
1 cup whole wheat  flour
1/2 cup ground oatmeal (see note below)
1 tsp baking powder
1⁄2 tsp baking soda
1⁄4 cup unrefined sugar
1⁄4 tsp sea salt
1⁄4 cup agave nectar
1 - 1 1⁄2 tsp pure vanilla extract
1⁄4 cup organic canola oil
1 tablespoon almond milk (or other nut or soy milk)
1⁄3 cup non-dairy chocolate chips
1/2 cup chopped walnuts

Preheat oven to 350°F (176°C). In a bowl, sift in the flour, oat flour, baking powder, and baking soda. Add the sugar and salt, and stir until well combined. In a separate bowl, combine the agave nectar and vanilla, then stir in the oil and milk until well combined. Add the wet mixture to the dry, along with the chocolate chips and walnuts and stir until just combined (do not over mix). Place spoonfuls of the batter on a baking sheet lined with parchment paper and flatten a little. Bake for 8-10 minutes, until just golden (if you bake for much longer, they will dry out). Let cool on the sheet for about 5 minutes then transfer to a cooling rack. Makes about 15 medium sized cookies.


Oatmeal flour can be made with your own blender.  We have recycled glass jars that fit the mouth of our old blender.  We use a 6 to 8 ounce jar to make a smaller container to blend the oatmeal into flour.  It works like a charm.  It is our BPA-free "bullet" blender.  It may look funny, but it works just fine.   An alternative would be using the Cuisinart or a spice blender. 

Monday, October 10, 2011

CREAMY YELLOW SUMMER SQUASH SOUP

My first box of vegetables arrived this week.  This is my third year of signing up for a weekly box of local vegetables at Green Cay and every week it seems like Christmas.  I have beautiful, fresh vegetables and endless possibilities.  Some of what was in our box included 6 summer squash, baby bok choy, fresh lettuce and a huge bag of basil.  I immediately set to work and blended fresh pesto with the basil, fresh spinach, pine nuts and walnuts (see previous post on pesto).  I divided the batch into 4 containers; froze three and used one container right away with a bowl of whole wheat pasta.  This time I added juice of a whole lemon and it just made the pasta zing.  Try it sometime.

Meanwhile, I really wanted to use some of the summer squash and I didn’t want to cook the first thing that came to mind – a stir fry with quinoa or pasta.  I also had some garbanzo beans and leeks which had me thinking about soup.  The lemon juice at the end really brought out the flavors.  Are you seeing a trend?  Yes, I am on a lemon kick.  We always have lemons or limes in the house.  Living in Florida, you would think we could just go pick them off the tree, but we don’t and can’t - something to do with a fruit fly invasion.  Oh well.  (Sometimes we have mangos falling from the neighbor’s trees and when they do, that really makes me happy.)

Ingredients:
1 onion chopped
2 leeks cleaned and white portion sliced thin
2 tablespoons olive oil
2 yellow squash chopped
1 can coconut milk
1 vegetable bouillon cube
2 cups water
1 ½ cups cooked garbanzo beans or 1 15 oz. can drained and rinsed
½ cup parsley roughly chopped
1 teaspoon toasted ground cumin (see previous post on cumin)
Salt and pepper to taste
Juice of ½ a lemon
Garnish with fresh made croutons*

Sauté the onion and leeks with the olive oil in a large stock pot.  Cook until translucent - about 5 minutes.  Add the squash and cook for about 5 minutes more.

Mix in the coconut milk, the water and the vegetable bouillon cube and simmer with the lid slightly ajar for 10-15 minutes.  Add the spices, herbs and beans and cook for about one minute.  Let the soup cool slightly.

Use an immersion blender to cream some of the squash and beans.  I like to leave it chunky so I don’t puree it very much.  Add the lemon and adjust seasonings.  Add the croutons just before serving.

*To make croutons: preheat oven to 425 degrees Fahrenheit. Cube some “day old bread” and drizzle with olive oil and sprinkle with a bit of salt. Toast in oven until crispy and brown (about 5-10 minutes).


Monday, October 3, 2011

ROASTED EGGPLANT AND SOBA NOODLES

This recipe is very similar to one that my friend Sue B. made for us when we were just starting to eat vegetarian.  I incorporated one cup hummus to the original recipe from EatingWell.com, adding 19 grams of protein and creaminess to the sauce.  Soba noodles also provide 8 grams of protein per serving (Eden Organic 100% Whole Grain is my favorite).   The roasted eggplant is scraped from the skin and breaks down into a sauce.  All in all, no one will care how much protein is in the dish because the combination of flavors is outstanding.  We have made many different versions of this recipe depending what we have on hand.      It is very versatile, so experiment and let me know how you do.

Ingredients:
1 medium eggplant (1 pound)
Olive oil for roasting the eggplant
8 ounces soba noodles (whole grain preferable)
3 cloves garlic, peeled and crushed
1/2 teaspoon salt or to taste
3 1/2 tablespoons rice vinegar
2 tablespoons reduced-sodium soy sauce
2 tablespoons minced fresh ginger
1 tablespoon agave nectar or honey
1 teaspoon organic mild/hot sauce (optional)
1 teaspoon toasted sesame seed oil
1 tablespoon olive oil
½ - 1 cup prepared hummus
3 cups grated carrots (about 5 carrots)
½ - 1 cup chopped fresh cilantro
1 cup diced cucumber
Gomasio Black Sesame Seeds with Sea Salt to garnish*
1.Preheat oven to 425 degrees.  Cut a piece of aluminum foil to fit a baking sheet. Cut eggplant in half lengthwise and put the halves cut-side down on a baking sheet.  Oil the eggplant on all sides.  Bake about 15-20 minutes until the skin is blackened and the flesh is very soft.  Set aside to cool.
2.Meanwhile, bring a large pot of lightly salted water to a boil to cook the soba noodles.
3.Cook noodles until just tender, about 5-8 minutes. Drain and rinse under cold water until cool. Press to remove excess water, transfer to a large bowl and toss with 1 teaspoon oil to keep them from sticking.
4.With a chef’s knife, mash garlic and salt into a paste. Transfer to a small bowl and add vinegar, soy sauce, ginger, agave nectar, hot sauce, toasted sesame seed oil and olive oil . Whisk until blended. 
5.Peel the cooled eggplant and discard the skin. Chop the eggplant flesh to a coarse puree. Add the hummus to the eggplant and stir well.  Add the eggplant/hummus mixture to the noodles, along with carrots and cilantro .  Add the dressing and toss until well combined. Just before serving, garnish with diced cucumber and  Gomasio Black Sesame Seeds with Sea Salt*.

*Gomasio Black Sesame Seeds with Sea Salt can be found in the Asian section of most grocery stores.  If you can’t find them, toast raw sesame seeds in a dry skillet until golden.


Monday, September 26, 2011

Raw Almond Butter


I was talking to my friend, Mary, the other day and I realized I was enthusiastic about something rather simple and basic as almond butter. I have tried store-bought almond butter and in my humble opinion the taste just doesn't compare.  Traditional almond butter is made with roasted almonds and I think that makes a BIG difference.

If you have been to Le Pain Quotidien in New York City, you must have tried their hazelnut spread.  It is unbelievable!!  It is also full of sugar and who knows what else.  I know you gotta splurge sometime, so when you are in New York City, slather on the hazelnut spread, but when at home, make it a little more wholesome.  My Raw Almond Butter reminds me of the Le Pain Quotidien hazelnut spread but without any sugar.  The raw almonds make it slightly sweet with a taste that reminds me of hazelnut!!  (Have I mentioned it is better for you too because it is raw!!!)

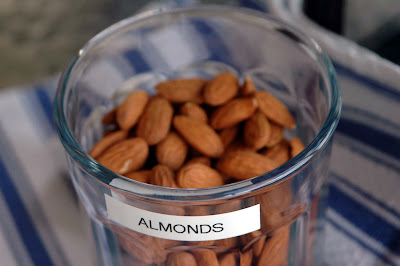
The recipe doesn't have any magic measurements.  I take about two cups raw almonds and I place them in a Cuisinart.  You will have to scrape down the sides many times to get the almonds to mix evenly.  Because the motor starts getting hot after about 10 minutes, I give the Cuisinart a rest and finish up a little later.

When the almonds start getting oily and thick and the mixture sticks together, add a tablespoon or so of Coconut Oil and a pinch of salt.  Mix some more and that is it.

You can refrigerate the Raw Almond Butter if you would like, but it is not mandatory.  We eat up our Raw Almond Butter so fast it doesn't matter.  Let me know what you think.  Get creative and add raisins or dates if you really want to live it up.

Monday, September 12, 2011

Cucumber Avocado Soup

Beth should get first billing for this soup because she inspired me when she whipped up something similar for a picnic this summer.  She served her soup in colorful martini glasses which made it super fun on top of being super tasty.

This past Labor Day Weekend Tom, Madison and I scoured NYC for great vegan food and not totally surprising to us Pure Food and Wine knocked our socks off.  It is a raw-vegan restaurant that I had heard about but I didn't think much of it until my carnivore friend, Marsha was raving about it.  If a big beef eater can rave about a raw-vegan restaurant it really must be good.  We concur with Marsha!  It really is WOW.  We just tried another raw-vegan food restaurant in Palm Beach Gardens, Christopher's Kitchen  and we were WOWED again!  Madison and I found out that this raw food restaurant owner cut his teeth at Pure Food in NYC.  We think the food is better here in Florida though.  Both are GREAT and worth a try.

This soup is also raw and if you wanted to add a bit of protein I would suggest adding some hummus and a bit more coconut milk.   Another idea is to soak raw cashews and blend them into the soup.  I think you can add or subtract as you see fit.

Cucumber Soup Recipe:

1 English cucumber
1 avocado
1/2 can coconut milk, light
1/3 cup sweet onion
1 lime, juiced
1 - 2 cloves garlic
Salt and Pepper to taste

Rough chop your cucumber, avocado, onion and garlic.  Place the garlic in the food processor first so it is chopped fine.  Add the onion and scrape down the sides.  Repeat until the onion and garlic is in very small pieces.  Add the cucumber and avocado and continue with the food processor until it is soupy.  Add the coconut milk, lime juice and salt and pepper.  Adjust seasoning to your liking.  Makes 4 starter portions.

Wednesday, June 1, 2011

ARUGULA AND HERB PESTO PASTA


This is nearing the end of the growing season for our CSA (Consumer Supported Agriculture) as it really gets hot and diminishes what can grow in this part of South Florida.  Since we are leaving for Connecticut soon the timing could not be better. 

Two hot weather vegetables we can count on are tomatoes and arugula.    I wanted to cook up something that would travel well on our drive up north and came up with a pesto dish.   I threw in all the fresh herbs I had to make it much more interesting and decided to deconstruct the pesto so I toasted the pine nuts and grated the parmesan and proclaimed them garnish!   

1 lb.  whole wheat pasta cooked according to package directions
4 cups greens – a mixture arugula, parsley and basil
3 cloves garlic
1/3 cup olive oil
Zest of one lemon (optional)
Salt and pepper to taste

Garnish:
Grated parmesan
Toasted pine nut
Chopped tomatoes


As the pasta is cooking, add garlic cloves to a Cuisinart.  Mince.  Add the fresh greens to the Cuisinart and as the machine is running drizzle the olive oil until the mixture forms a lovely green pesto consistency.  Add your lemon zest and salt and pepper. 

Toss the pesto with the cooked pasta and add your parmesan, pine nuts and tomatoes. 

Eat well and travel well.

Thursday, May 26, 2011

Black-Eyed Peas with Chard, Corn and Onions

Fresh Black Eyed Peas
I am now in love with black-eyed peas and I am not referring to the wildly popular music group, but the delicious legumes that I hope I can convince Madison to grow this summer in Connecticut.  My local farm in Boynton Beach, FL provided me with a bag of mature black-eyed pea pods that were dry and ready to be shucked or shelled.  It was kind of a fun project for my daughter.  She took the pods and spread them out in a rimmed cookie sheet and went to work getting the peas out of the pod.  Because the pod is dry, the peas mostly just pop right out.  I don’t know how long they will store this way.  I would recommend cooking them right away and freezing them, or freeze them just after they have been shucked.

When referring to recipes that ask for black-eyed peas (or cowpeas – I am not making this up), you don’t have to cook freshly shelled peas as long, so check on the progress as you cook them.  In my recipe, my peas were done in about 20 minutes.

I also discovered that black-eyed peas sprout beautifully.  (This has nothing to do with this recipe, but everything to do with different ways to enjoy black-eyed peas!)  They make an incredibly healthy and delicious snack as well as a crunchy addition to a salad.   See my previous post about sprouting mung beans.  (Black-eyed peas are related to mung beans too. Maybe that is why they both are easy to sprout.)


Ingredients:
1 cup freshly shelled black-eyed peas
4 cups fresh chard, stems removed and roughly chopped
(spinach or arugula could be substituted for chard, just add at the last minute and wilt them rather than cook them)
2 medium to sweet onions
3 ears fresh corn, cut off the cobb
1 Tablespoon freshly toasted and ground cumin (see previous post)
1 teaspoon dried chipotle pepper (optional)
¼ cup water to steam the chard

Start the black-eyed peas and three cups water in a saucepan and cover.  Simmer.  Check after 20 minutes.  Depending on how dry the beans are, they may need to simmer longer before they are ready.

Meanwhile peel the onions and cut in half.  Slice in ¼ inch slivers.  Sauté the onions in a medium sized sauté pan until they are golden.  About 5 minutes.  Add the spices and the chard.  While cooking the chard, add water to steam it.  The chard should be cooked through in 10-15 minutes.   I had older, more mature chard that took at least 15 minutes.  Most of the chard found in the grocery store will probably be done quicker.  Add the cooked peas and the fresh corn to the vegetables and heat through.  Salt and pepper to taste.

Black eyed-peas with collards are considered a good luck New Year’s dish too.  I will have to do some more research to find out why.  Happy healthy eating.

Thursday, May 19, 2011

Tomato Watermelon Salad


 I have to admit a secret.  I have been holding out on one of my favorite things to add to salads and it is so simple that I am embarrassed to admit it, but I love to sprout Mung Beans.  They must be the simplest bean to sprout and I don’t know why I don’t sprout them more often. 

When the weather gets really warm in Florida, I start thinking of salads that I can throw together without heating up the house while also adding some protein in the mix.  Mung Beans are the answer!!

I buy the beans in the bulk aisle of Whole Foods.  When I tried to find Mung Beans at the Whole Foods in West Hartford, CT (horror of horrors!!), they did not have any in the bulk section.  They have an expensive alternative - prepackaged and spouted and then dried.  Forget it!  They took all the fun out of it.

I hope you can find them where you live, because they are so easy and add a nice crunch while adding a bit of protein.

Soak about a ½ cup of dried Mung Beans overnight.  The next morning, rinse the beans off with cool water and keep in a container on the counter loosely covered.    Rinse them off about 4 times during the day.  Just keep the beans moist, but not swimming in water. 

By dinnertime you have sprouted Mung Beans. Refrigerate any you don’t end up eating in the salad or directly out of the bowl.  They are a very addictive and healthy snack. 


I added them to my tomatoes and watermelon that I got from my local farm.  Add a little basil, olive oil and salt and you are good to go.

Wednesday, May 11, 2011

SPICE IT UP!!


When eating vegetables one of the challenges I find is giving the recipe a more complex taste and an easy way you can achieve this is by toasting and grinding spices.  It makes the spice come alive and can truly bring the dish to the next flavorful level.

My favorite is toasted cumin and I like to have about a week's worth on hand to use in almost any savory vegetarian dish.  I have found that when I use purchased ground cumin it adds a lot more heat to the dish, but when I toast cumin seed and grind it, the heat is a lot milder but the flavor BIGGER.

There are boatloads of seeds and spices you can toast to bring out the oils and flavor.  Experiment for yourself and make your recipes come alive.


Start with a couple tablespoons cumin seed in a dry small skillet at medium heat.  Stir the seeds and watch them closely as the seeds can char and burn rather quickly.  When you see the seeds turn brown and you can smell the seeds toasting it is time to take the pan off the heat.  Let the seeds cool slightly and grind in a spice grinder.


The following is an informative link on how to get the most out of your spices.
Spice 101

Wednesday, April 27, 2011

Peanut Butter Ice Cream

 (vegan ice cream - shhhhhh - don't tell anyone, they will never know!!)

This is by far the best recipe for vegan ice cream that I have come across.  We recently purchased an ice cream maker at Sur La Table by Cuisinart in bright citrus orange.  The price was half off and the machine seemed simple enough so we went for it.

We have made this recipe before, but not with the ice cream maker.   What a huge difference.  It was creamy and flavorful.  And best of all it is easy and packed with protein!!

www.vegetariantimes.com has the original recipe and I adjusted it to our tastes.

INGREDIENTS: 
1 13.5-oz. can light coconut milk
½ cup agave nectar (we like it less sweet so put in a little less if you wish)
½ cup crunchy peanut butter (add a little more if you like it more peanut buttery)
1 tsp. vanilla extract
1 cup French vanilla soy or original flavor soy creamer

Put all the ingredients in a blender and mix well.  Pour into an ice cream maker and within 20 minutes you will have a creamy dessert.  Voila!!

Wednesday, April 20, 2011

Purple Pizza!


One of our favorite pizzas that we make is a cauliflower pizza with olives and garlic.  It is a simple combination that makes magic when combined.  I invited some friends over a few weeks ago and they were game to try our pizza and it is now one of the favorites in their house too.

The recipe comes from My Bread by Jim Lahey.  We just jazzed it up the other day with purple cauliflower and pine nuts.   Sometimes we add parmesan but this time we kept it vegan.  Either way it is a winner.  Give it a try.

Make the pizza dough following directions according to my previous post on Zucchini Pizza. 

Topping Ingredients:
1 medium cauliflower shaved on a mandoline so it is in very thin slices
1/2 cup pitted olives
3 cloves garlic
1/2 teaspoon crushed red pepper flakes
1/4 cup olive oil
Parmesan (optional)
Bread crumbs (optional)
Pine nuts (optional)

Spread the dough in a greased 13 x 18 rimmed baking sheet, using olive oil to coat. 

Mince garlic in a Cuisinart and then add the olives and pulse to chop fine.  Add the garlic/olive mixture to the shaved cauliflower.  Mix in the red pepper flakes, olive oil and salt to taste.

Spread the mixture evenly over the dough to the edges and bake in a preheated 450 degree oven.   If you wish, add the pine nuts or bread crumbs at this time.  They will brown nicely as the pizza cooks.  Cook 10 minutes and rotate.  Cook another 10 until the edges are brown for a total cooking time of about 20 minutes.  (Use a fork to pop any bubbles in the dough that may occur while the pizza is cooking.)

As the pizza is still hot and out of the oven you may add the parmesan.

Wednesday, March 30, 2011

ZUCCHINI PIZZA WITH CARAMELIZED ONIONS

Jim Lahey put out a book on making no knead bread in 2009 and he has taken the world by storm.  I received this book called My Bread as a Christmas present last year and it has been the book I go to at least once a week.  I love his Walnut Bread and make it for breakfast all the time.  Pizza night has become a weekly occurrence too.  My  family devours the Cauliflower Pizza and The Tomato Pizza .  But this week we tried something new -  The Zucchini Pizza.    I had a couple big zucchinis from the farm and wanted to give it a try.  It was delicious with and without cheese and I thought I would share it with you.  I changed the recipe somewhat by using a little less zucchini than Jim called for and adding caramelized onions. 


Basic Pizza Dough
Jim Lahey/My Bread
3 3/4 cups( 500 grams) bread flour
2 1/2  teaspoons (10 grams) instant or other active dry yeast
3/4 teaspoon (5 grams) table salt or fine sea salt
3/4 teaspoon plus a pinch (5 grams) sugar
1 1/3 cups(300 grams) room temperature ( about 72*F) water
extra virgin olive oil for the pans

1. In a medium bowl, stir together the flour, yeast, salt, and sugar
Add the water and using a wooden spoon or your hand,  mix until blended.   The dough is a bit stiffer than most of the other dough in Jim Lahey’s book,  not as wet and sticky.   I usually need to work the dough in the bowl to get the dough incorporated into a ball.
Cover the bowl and let sit at room temperature until the dough has doubled in volume, about two hours.

2. Oil two 13 by 18 inch rimmed baking sheets. Use a bowl scraper or rubber spatula to scrape  dough onto an oiled pan in one piece. Cut the dough into two equal parts.   Make sure your hands and the dough are coated with oil.  Gently press  and stretch the dough across the surface of the pan so the dough  is even to the edges.  Pinch any holes together. Repeat with the second piece.
The dough is ready to top as you like.
Get the oven ready and preheat at 450 degrees.  My Bread suggests  a 500 degree temperature, but I have found it is too hot for my oven.  So see what works for you.


Zucchini Topping
2 lbs zucchini, trimmed and grated
1 ½ teaspoon salt
2 cups Gruhyere cheese, grated
2 tablespoons bread crumbs
2 onions sliced and caramelized
As the oven in preheating, grate the zucchini.  I used my food processor.
Mix the salt in with the grated zucchini and let stand for 15 minutes.  Drain the zucchini in a colander.  I also squeezed the extra moisture out with several towels.  In a medium bowl, toss the zucchini and cheese together.  (I used half the cheese to make half the pizza vegan)
Spread the zucchini mixture over the prepared dough all the way to the edges.  Spread the caramelized onions evenly over the pizza and finish off with the bread crumbs.
Bake for 10 minutes and rotate for the next 10 minutes.  My Bread has a lot longer time, but my oven must be way warmer than his.  I have to say I cannot imagine the pizza without the caramelized onions.  It gives the pizza a GREAT flavor.   And the pizza was amazing with or with out the cheese.

This is what it looked like before we put it in the oven.  And then what it looked like after.